Mini Cart

  • No products in the cart.

Jennifer Jangles Blog

  • Home
  • Archive by Category "Jennifer Jangles Blog"


Last year I barely squeezed my clearance sale into January. This year I am a bit more prepared. That's good because folks have been asking when it's happening. It's going to start this Wednesday morning. I will be sending out my newsletter that day to announce it. You can sign up at my blog or my website if you don't already receive them.

I have been cleaning up the studio to make sure I have...

Read more

2012


Hey, Hey, Before I jump into 2013 at full speed I thought it would be a good idea to look and back and see what all happened in 2012. There were big changes and it was the first year I ever chose a word instead of listing my goals. I have to say it was awesome and I have chosen another word for this year, but we'll save that for another year. This years word was Clear and boy did I do that.


The...

Read more


Hey, Hey,

Hope you had great holidays! I'm still taking a little break and hanging with my family, I'll be back to blogging, e-mailing, and more next week. Until then, enjoy the ruffled bib pattern here on the blog. I've got loads of free projects on the the right hand side of the blog if you're looking for a new project.

I have a limited amount of fabric that I came across from the old gallery. It...

Read more

Easy Ornaments


Ornaments

Supplies:
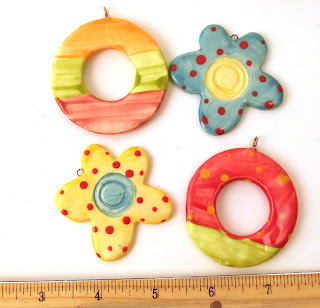
1 large ceramic pendant, 5" aluminum or other craft wire, 1-2 accent beads, round nose pliers, chain nose pliers, and wire cutters
Instructions:
1. With your round nose pliers make a swirl at one end of your wire.
2. Slide the wire through the hole of the pendant. Once through, bend the wire at a ninety degree angle so it is standing straight up from the ornament.
3. Slide the accent...

Read more


Flower Bracelet
Supplies:
1 domed ceramic flower button, 1 wood bead, approximately 20" waxed cotton cording, 1 clasp, 2 seed beads
Instructions:
1. Begin by folding the cording in half. Approximately 1/4" past the fold tie a knot. (This is the loop the clasp will hook to.)
2. Determine the length you will want half of the bracelet to be (usually 3") Tie another knot here.
3. Slide the two ends of the...

Read more