- No products in the cart.

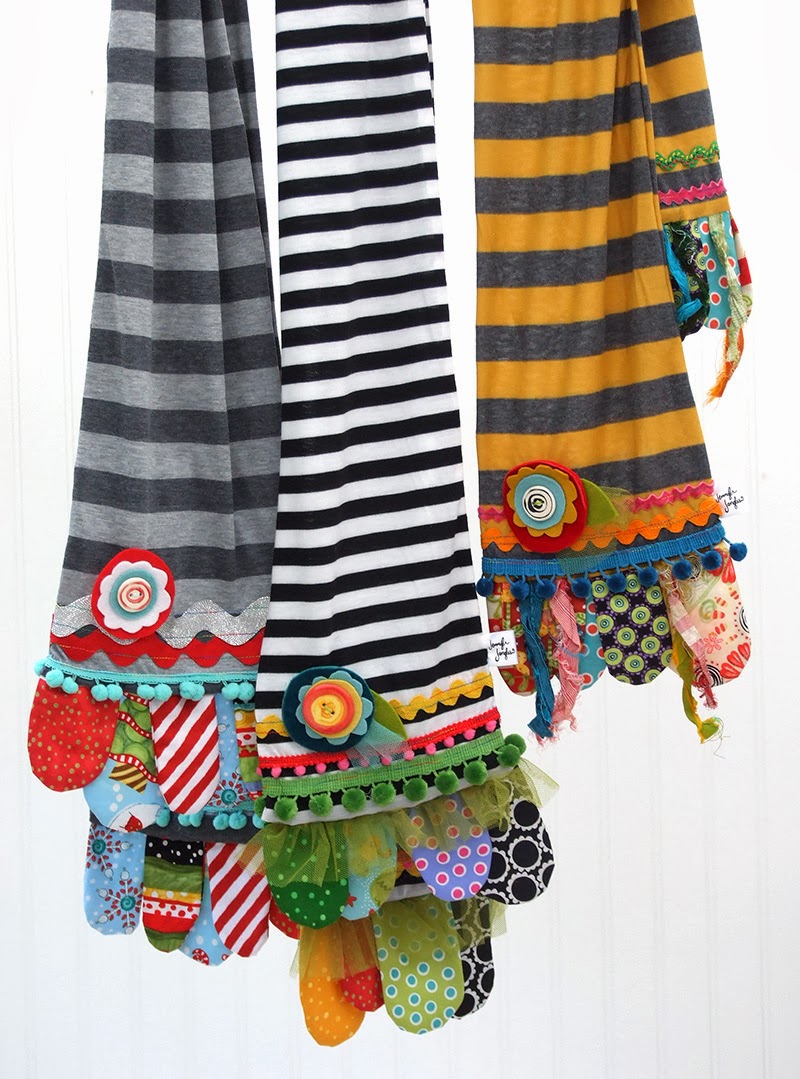
Let me tell you had much fun I had making these. I seriously want to start up a scarf making business, hit the road and do shows selling them. I had to reel it back in because I might have too much going on to fit that in, but let's just say I was excited. These are FUN to make!
The scarf body is knit, so it's super soft around your neck. Then it's time to clean out those scrap bins, anything goes with these scarves.

The downloadable Happy Scrappy Scarves Pattern is now free when you subscribe to the Maker newsletters.
Here's what you'll need:
Desired length of scarf x 18"(mine are 40" long)
Scraps of fabric measuring at least 8" x 6"
18' or longer trim pieces
felt, velvet, tulle, etc for flower layers
1" or 1.5" ceramic button
Instructions:
1. Using the two fringe pattern pieces cut out 8-9 fringe pieces. This should be done with right sides together.
2. Sew around the outside of the fringe using a 1/4" seam allowance. Leave the straight edge open. Clip around the curves, turn, and press. Do this for all fringe pieces.
3.Square up the knit fabric so it measures approximately 18" by the length you would like for your scarf. I choose to make mine long so they are 40" in length.
4. Lay out one end of the scarf on your work surface. Pin or spray bast the desired trims across the bottom of the knit fabric. Leave about an inch below the lowest trim. Sew these in place.
5. Find the middle of the scarf and mark with a pin. Start arranging the fringe pieces along the bottom of the scarf to the middle pin mark. Point the curved edges in toward the middle of the scarf. Leave approximately 1/2" on each side without fringe for sewing later. Layer as many fringe pieces across the bottom as you would like. Repeat for remaining end of the scarf.
6. Fold the scarf in half so the right sides are together. Sew along each end of the scarf, securing the fringe. Sew up the length of the scarf as well leaving approximately a six inch hole along the side for turning.
7. Turn the scarf inside out and hand stitch the opening closed.
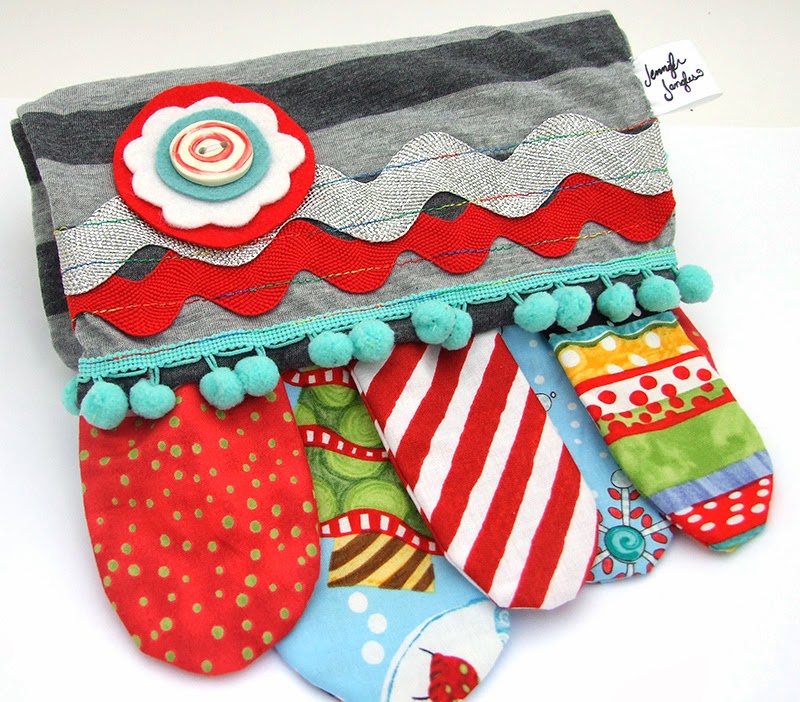
1. Cut out layers of felt, velvet or quilt fabric using the pattern pieces.
2. Stack them up so the largest layer is on the bottom and they get smaller as the go up.
3. Place the button on top and sew through the button and all of the layers to secure.
4. If you desire you can add a felt leaf tho the bottom of the flower.
5. Arrange and sew into place on one end of the scarf.

The downloadable Happy Scrappy Scarves Pattern is now free when you subscribe to the Maker newsletters.
Have a great day!

Are you receiving my Project Newsletters? You can sign up here. Don't miss a thing!
Visit my Website, Etsy Shop, Blog, Facebook