- No products in the cart.
Why did I want a mask so badly? We officially have two teenage boys in the house. On the weekends, I am always in bed before they are. Lights are on, there's tv, music you name it, so I have to gear up with earplugs and a mask to get some shut eye. You should see me, I am quite a sight because I also have a bite gaurd and wrist brace....yep looking good! Is that TMI? Maybe we should get to the tutorial.
The downloadable pattern pieces can be found here.
You will need:
Fabric for the top of the mask
Fabric for the bottom and back of the mask
Batting
Felt for eyelashes
1/2" elastic
Instructions:
1. Cut out One top and one bottom for the front of the mask. Go ahead and cut out the felt eyelashes as well.
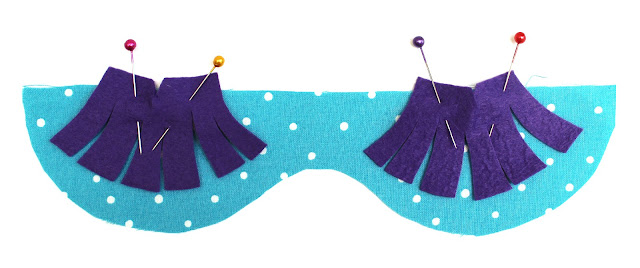
2. Next, pin the eyelashes onto the bottom of the mask, When pinning, flare them out a bit, so there is separation between the lashes. The notch at the top is there to help.
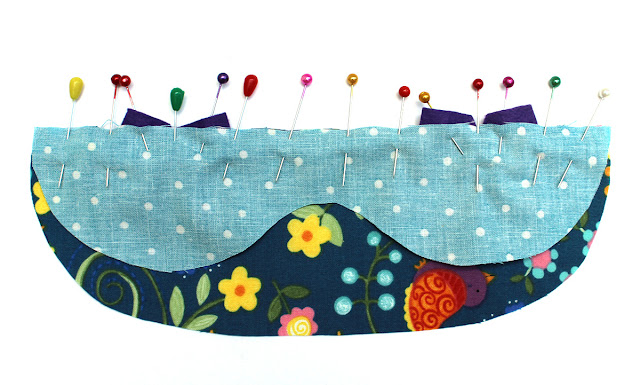
3. Pin the top fabric face down on to the bottom so the straight edges align. Sew across using a 1/4" seam allowance.
4. Press open the front of the mask. Place it on top of the backing fabric and use the front as a pattern piece for the back. Cut around the outside. Us the backing fabric to cut out a pice of bating the same size.
5. Measure and cut the elastic to the size needed for fitting your head. My elastic ended up being 15" long just in case you're making his as a gift. Pin the elastic just above the middle seam on each side of the front of the mask. Be sure the raw edges are facing outward.
6. Place the two right sides of fabric together, make sure the elastic band is tucked inside the two layers and pin. Place a layer of batting on one of the sides and pin as well.
7. Sew around the outside of the mask, leaving a 3" opening across the top for turning. Clip all of the seams and turn right side out. Press and hand stitch the opening closed.


